When migrating a large number of Microsoft 365 mailboxes to another mail platform, password-based IMAP authentication is usually blocked. The right approach is to create a Microsoft Entra ID application with an Exchange Online application permission, then explicitly grant it access to the mailboxes to migrate. This guide explains the steps to perform on the customer side.
Goal
Create an application access method that can connect to one or more Microsoft 365 mailboxes over IMAP with OAuth2, without asking each user to sign in manually. This method is suitable for bulk migrations, for example hundreds or thousands of mailboxes.
How it works
There are two ways to use OAuth2 with Microsoft 365 IMAP:
- Delegated OAuth: a user signs in and authorizes the application for their own mailbox. This mode is not suitable for a bulk migration.
- Application OAuth, also called app-only: the application authenticates with its own secret or certificate. This is the mode to use for automating a migration of many mailboxes.
For a bulk migration, use the app-only mode. The Microsoft 365 administrator creates an application, grants it the IMAP.AccessAsApp permission, then explicitly authorizes this application to access the relevant mailboxes in Exchange Online.
Information to prepare
Before you start, make sure you have:
- a Microsoft 365 administrator account with access to Microsoft Entra ID;
- administrator access to Exchange Online PowerShell;
- the list of mailboxes to migrate;
- the ability to create an app registration and grant admin consent.
Step 1: create the application in Microsoft Entra ID
- Open the Microsoft Entra admin center at entra.microsoft.com.
- Go to Microsoft Entra ID → App registrations.
- Click New registration.
- Name:
InfoSwitch Migration IMAPor an equivalent name. - Supported account types: Accounts in this organizational directory only.
- Redirect URI: not required for app-only mode.
- Confirm the creation.
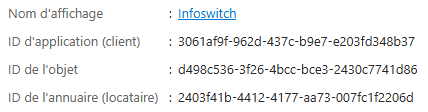
Once the application is created, note the following two values:
- Application (client) ID
- Directory (tenant) ID
Step 2: add the application IMAP permission
- In the application you created, open API permissions.
- Click Add a permission.
- Choose APIs my organization uses.
- Search for Office 365 Exchange Online.
- On the next screen, Microsoft Entra asks you to choose the permission type: select Application permissions, not Delegated permissions.
- Check
IMAP.AccessAsApp. - Add the permission.
- Click Grant admin consent.

Avoid the wrong permission type
The IMAP.AccessAsUser.All permission is a delegated permission. It requires a user sign-in and is not suitable for a bulk migration. For an automated migration, use IMAP.AccessAsApp under the application permissions of Office 365 Exchange Online.
Step 3: create a client secret
- In the application, open Certificates & secrets.
- Click New client secret.
- Choose an expiration duration of 90 days, long enough for the migration period while limiting how long the secret remains valid.
- Immediately copy the secret value.
Store the client secret value in a secure place. It will no longer be visible later in Microsoft Entra ID. If you lose it, you will need to create a new secret.
Step 4: retrieve the Object ID of the enterprise application
This step is important: Exchange Online does not use the Object ID visible in the app registration. You must retrieve the Object ID of the enterprise application, meaning the service principal created in your tenant.
- In Microsoft Entra ID, open Enterprise applications.
- Search for the
InfoSwitch Migration IMAPapplication. - Open its details page.
- Copy the Object ID.
In the commands below, this value is called ENTERPRISE_OBJECT_ID.
Step 5: register the service principal in Exchange Online
Open PowerShell as an administrator, then connect to Exchange Online:
# Install and load the Exchange Online module
Install-Module ExchangeOnlineManagement -Scope CurrentUser
Import-Module ExchangeOnlineManagement
Connect-ExchangeOnline
Define the following variables:
# Replace these values with the ones retrieved from Entra
$ApplicationId = "APPLICATION_CLIENT_ID"
$EnterpriseObjectId = "ENTERPRISE_OBJECT_ID"
$DisplayName = "InfoSwitch Migration IMAP"
Then register the service principal in Exchange Online:
# Register the Entra application in Exchange Online
New-ServicePrincipal -AppId $ApplicationId -ServiceId $EnterpriseObjectId
If needed, give it a readable name:
# Optional: define a readable name
Set-ServicePrincipal -Identity $EnterpriseObjectId -DisplayName $DisplayName
Check that Exchange Online knows the service principal:
# Check that the service principal is known by Exchange Online
Get-ServicePrincipal | Where-Object {$_.AppId -eq $ApplicationId}
Step 6: authorize the mailboxes to migrate
Microsoft does not automatically grant access to all mailboxes in the tenant. You must grant access to the mailboxes concerned. To avoid handling accounts one by one, prepare a CSV file with all addresses to migrate.
To generate a CSV from Exchange Online with user mailboxes and shared mailboxes:
# Generate mailboxes.csv with user mailboxes and shared mailboxes
Get-Mailbox -ResultSize Unlimited -RecipientTypeDetails UserMailbox,SharedMailbox |
    Select-Object @{Name="Email";Expression={$_.PrimarySmtpAddress.ToString()}} |
    Export-Csv .\mailboxes.csv -NoTypeInformation -Encoding UTF8
Shared mailboxes, including unlicensed shared mailboxes, can be migrated with this app-only mode if they are present in the CSV, if the application receives FullAccess, and if IMAP is enabled.
Email
firstname.lastname@domain.com
contact@domain.com
support@domain.com
To authorize all mailboxes in the mailboxes.csv file in a single command:
# Authorize all mailboxes listed in mailboxes.csv
Import-Csv .\mailboxes.csv | ForEach-Object {
    Add-MailboxPermission -Identity $_.Email -User $EnterpriseObjectId -AccessRights FullAccess
}
Propagation delay
Admin consent and FullAccess permissions are not always applied immediately. On a large tenant, propagation can take from a few minutes to about an hour. An IMAP refusal immediately after this step does not necessarily mean the configuration is wrong.
You can verify the permissions on all mailboxes listed in the CSV:
# Verify permissions on all mailboxes listed in mailboxes.csv
Import-Csv .\mailboxes.csv | ForEach-Object {
    Get-MailboxPermission -Identity $_.Email | Where-Object {
        $_.User -like "*$EnterpriseObjectId*"
    } | Select-Object @{Name="Mailbox";Expression={$_.Identity}},User,AccessRights
}
Step 7: verify that IMAP is enabled
OAuth access is not enough if IMAP is disabled on the mailboxes. Check the IMAP status of the mailboxes listed in the CSV:
# Check whether IMAP is enabled on all mailboxes listed in mailboxes.csv
Import-Csv .\mailboxes.csv | ForEach-Object {
    Get-CASMailbox -Identity $_.Email | Select-Object PrimarySmtpAddress,ImapEnabled
}
To enable IMAP on all mailboxes in the mailboxes.csv file:
# Enable IMAP on all mailboxes listed in mailboxes.csv
Import-Csv .\mailboxes.csv | ForEach-Object {
    Set-CASMailbox -Identity $_.Email -ImapEnabled $true
}
Common errors
Invalid scope or token without IMAP permission
Check that the scope used for the app-only token is:
https://outlook.office365.com/.defaultAlso check that the application has the IMAP.AccessAsApp application permission on Office 365 Exchange Online, with admin consent granted.
IMAP authentication refused despite a valid token
The most common causes are:
- the service principal was not registered in Exchange Online with
New-ServicePrincipal; - the Object ID used is not the enterprise application Object ID;
- the mailbox did not receive the
FullAccesspermission for this service principal; - IMAP is disabled on the mailbox;
- the permissions were just added and have not propagated yet;
- the IMAP connection is attempted with a mailbox address different from the one authorized.
Blocked by Conditional Access
Some organizations apply Conditional Access policies to workload identities, enterprise applications or service principals. If the app-only token is obtained but IMAP refusals are systematic across the tenant, check that no Conditional Access policy blocks this application or app-only connections to Exchange Online.
Do you need a refresh token?
No, not for app-only mode. The server can request a new access token at any time with client_id, tenant_id and client_secret. The token obtained usually expires after a limited time, but it can be renewed automatically without user interaction.
Information to send to InfoSwitch
Once the configuration is complete, send the following only through a secure channel:
- the application client ID;
- the tenant directory ID;
- the client secret value;
- confirmation that the service principal was registered in Exchange Online;
- confirmation that the mailboxes to migrate received the
FullAccesspermission for this service principal; - confirmation that IMAP is enabled on the relevant mailboxes;
- the CSV list of mailboxes to migrate, if it has not already been provided.
Ready to migrate to Infomaniak?
Contact us for a free 15-minute audit. We will analyze your situation and provide you with a personalized quote.
Request a free audit